Enter Values Dialog Box Properties
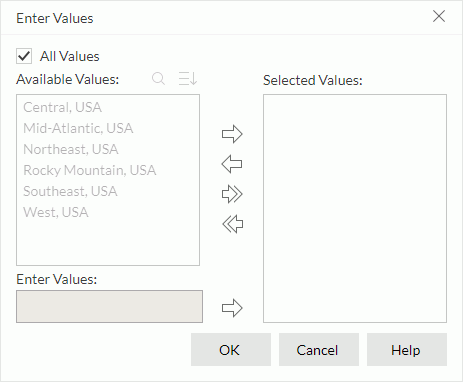
Use the Enter Values dialog box to specify multiple values for a parameter. This topic describes how to select or type multiple values.
Server displays the dialog box when you select the arrow  in the value combo box while specifying values for a parameter that enables multiple values.

All Values
Server displays this option when the parameter's Enable the "All Values" Option property is true. By default, Server selects this option and applies all the values of the parameter. In this case, when you insert the parameter as a field into a report, the field will show the string All.
Clear All Values if you want to customize the values. Then Server enables the following options.
Available Values
Server lists the predefined parameter values for selection. When the parameter is bound with a column, but the display column is different from the bound column, it lists the values of the display column here.
When the parameter has more than 500 values, after you scroll down to the bottom of the value list, Server automatically loads more values into the list.
-
 Search button
Select to open the search box to search for values among the available values. To start the search, type the text you want to search for, and Server lists the values that contain the matched text. The search results are case insensitive and do not match whole word. -
 Sort button
Select to open the Sort menu to sort the values in the ascending or descending order or following the original order as in the database.
Enter Values
Server displays this option when the parameter's Allow Type-in of Value property is true. You can add values for the parameter manually.
When the parameter is of the Date, DateTime, or Time type, you can select the Calendar icon  to open the calendar to specify a date and time value.
Selected Values
Server lists the values that you have selected. The selected values are case sensitive.
 Add button
Select to add the selected values from the Available Values box to the Selected Values box, or add the value you typed in the Enter Values text box to the Selected Values box.
 Remove button
Select to remove the selected values from the Selected Values box.
 Add All button
Select to add all the listed values from the Available Values box to the Selected Values box.
 Remove All button
Select to remove all the values from the Selected Values box.
OK
Select to apply any changes you made here and close the dialog box.
Cancel
Select to close the dialog box without saving any changes.
Help
Select to view information about the dialog box.
 Previous Topic
 Back to top